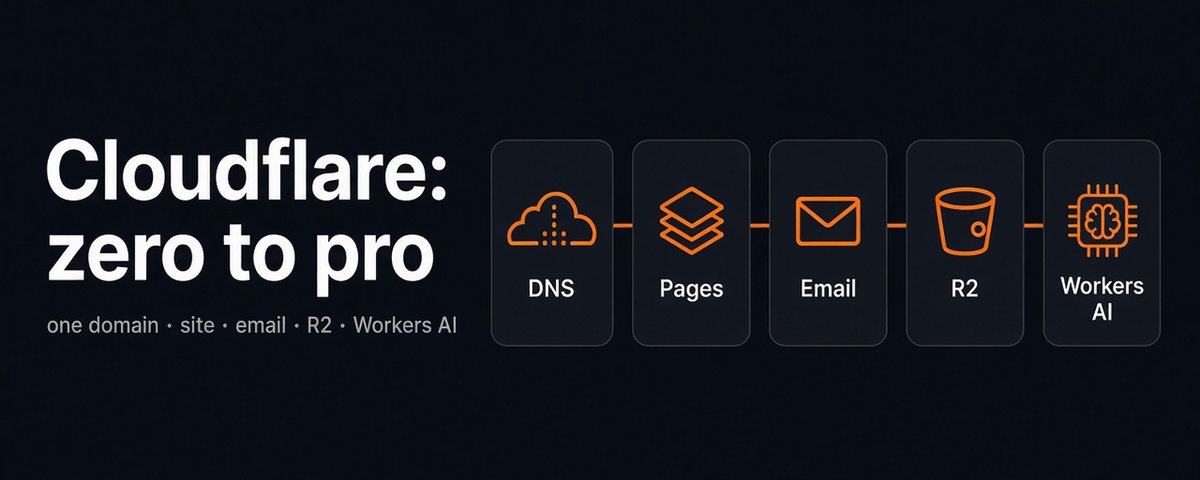
Cloudflare from zero to pro: one domain for your site, email, storage, and AI backend
Table of Contents
Originally published on X on November 1, 2026.
A lot of people first log into @Cloudflare because some tutorial told them to "put your domain on Cloudflare." You swap the nameservers and the site loads. Then you go back to the dashboard and the sidebar is huge: Domains, Compute, AI, Storage & databases, Application security, Zero Trust. All of it looks useful. You can't tell which parts matter for you.
I ship on this stack every day. these are the open tools i run (or help run) on my own cloudflare account. start here:
-
aicmohq.com — cli/mcp ai marketing for solo technical founders
-
Shiba — your AI employee (self-hosted on Workers and Durable Objects)
-
OpenPub — write one markdown file, draft it out to blogs and X Articles
-
VoiceDesk — voice desk / voice agent ui on cloudflare
-
Appflare — install open-source apps into your own cloudflare account
-
OpenSEO — keywords, rankings, site health, via appflare
We'll follow one domain from start to finish. First you connect it to Cloudflare and set up DNS and HTTPS. Then you deploy a site from a GitHub repo, give the domain an email address that actually receives mail, and use R2 for images and backups. Last, you write a Worker that calls an open model on Workers AI, and you let an agent manage the account through the CLI.
What "pro" means here: on the free plan, you can run a personal site, domain email, object storage, and a small AI endpoint yourself. You know where each free limit sits, what to check first when something breaks, and when to stop and confirm before touching API tokens or deletes. Enterprise WAF tuning, Zero Trust networking, and big paid architectures aren't covered.
I use example.com in the text, so swap in your own domain. The screenshots come from my own account in the English UI. Cloudflare moves menus around often, so trust the screenshot over the text if they disagree.
Contents
Part 1: Get the domain in
-
What Cloudflare does for regular people
-
Add your domain to Cloudflare
-
DNS, proxy, and HTTPS
Part 2: Site, email, storage
-
Deploy a site from a GitHub repo
-
An email address on your domain that receives mail
-
R2 for images and backups
Part 3: Block traffic you don't want
- AI Crawl Control and AI Labyrinth
Part 4: Add a backend and AI
-
Workers: a bit of backend for your site
-
Workers AI: open models on the free tier (plus Clef)
Part 5: Hand it to an agent, keep a cheat sheet
-
Let agents drive: managing Cloudflare with cf
-
Free-tier cheat sheet and FAQ
If you just want to fix a problem right now, skip to chapter 11.
1. What Cloudflare does for regular people
1.1 It sits in front of your site
Most people think of Cloudflare as a CDN that makes sites faster. That's half of it.
The better picture: Cloudflare sits between your visitors and your server. Once your domain is on it, every request hits Cloudflare's network first. Then Cloudflare decides what to do: serve it from cache, pass it to your server, block it, or hand it to code running on Cloudflare.
So it works on three layers.
Front door. DNS, CDN, HTTPS certs, and basic protection. This is where most people start.
Developer platform. Workers run your site and backend code. R2, KV, and D1 handle storage. You can build a full small app without a server.
Agent infrastructure. Workers AI calls open models directly, Clef makes quick decisions for agents, and the new cf CLI is built for agents to operate the account.
1.2 The free plan lasts a long time
Everything in this guide runs on the free plan. Personal sites, portfolios, docs sites, and small tools rarely hit the limits.
These numbers can change. Check the official docs before you rely on them. Details for each service are in its chapter.
1.3 What you'll be able to do by the end
-
Connect a domain to Cloudflare and know the difference between Proxied and DNS only
-
Pick the right SSL/TLS mode and avoid "too many redirects"
-
Deploy a site from a GitHub repo and put it on your own domain
-
Receive mail at hi@example.com and forward it to your normal inbox
-
Create an R2 bucket and serve files from your own domain
-
See which AI crawlers hit your site, and turn on AI Labyrinth
-
Deploy a Worker that calls an open model and returns an answer
-
Have an agent use cf to look up commands, preview changes, then run them
It looks like a lot, but it all ends up on one domain. Start with the dashboard.
2. Add your domain to Cloudflare
2.1 Learn the dashboard map
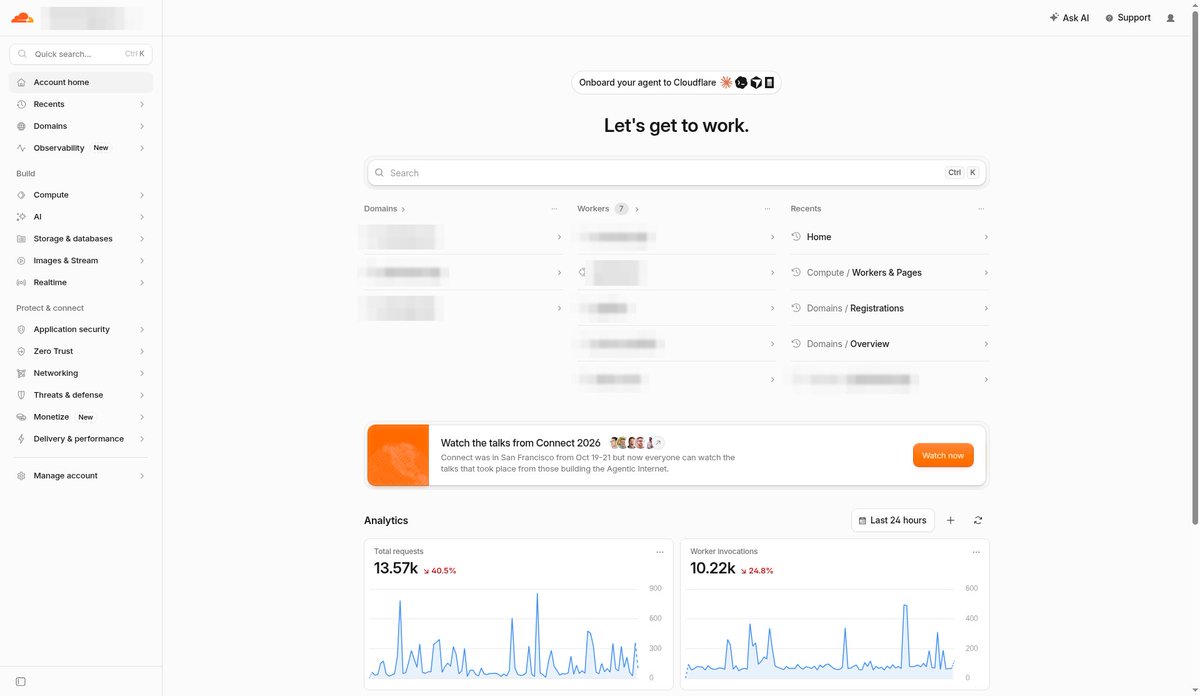
After you log into the Cloudflare dashboard (https://dash.cloudflare.com), the left sidebar is the entry point for the whole account. You don't need to click everything. Remember these groups:
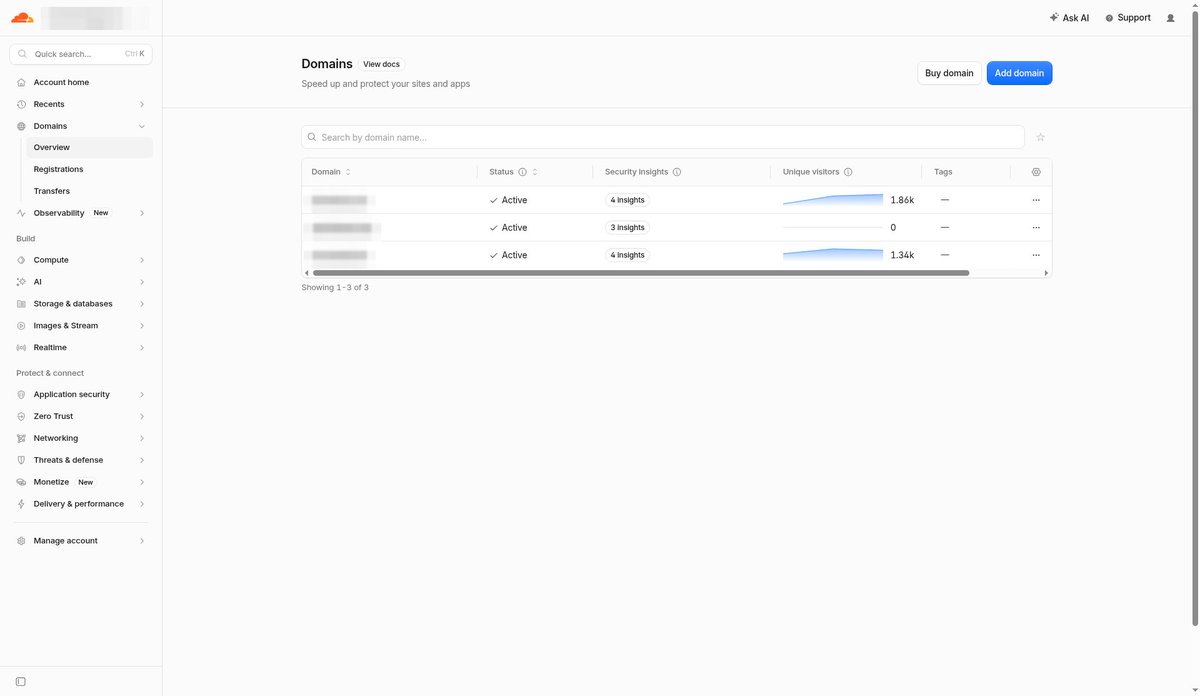
-
Domains: each connected domain has its own DNS, SSL/TLS, and security settings
-
Compute: Workers & Pages, and Email Service
-
AI: Workers AI models
-
Storage & databases: R2, Workers KV, D1
The dashboard gets redesigned a lot, so names and positions may not match the screenshots. If you can't find something, hit ⌘K (Ctrl+K on Windows) and search for it. That's usually faster than digging through menus.
2.2 Add the domain
Go to Domains and pick Onboard a domain. Enter the root domain, example.com. Use the bare domain without www. You'll manage subdomains later in DNS records.
Choose the Free plan. Cloudflare scans your existing DNS records and lists what it finds.
The scan can miss things. Check three kinds of records: where example.com points, whether www and other common subdomains are there, and whether your email records (MX, SPF, DKIM) made it. Add anything missing by hand before you continue. If you skip the mail records here, the usual result after the switch is that mail stops arriving.
2.3 Change nameservers at your registrar
Cloudflare gives you two nameservers that look like ashton.ns.cloudflare.com. Go back to wherever you bought the domain (Namecheap, Spaceship, Porkbun, whatever) and replace the old nameservers with these two.
You can always find them later under the domain's DNS → Settings.
Before you change anything: if DNSSEC is on at your registrar, turn it off first. Cloudflare's docs warn that switching nameservers with old DNSSEC still active can take your domain offline for a while. You can turn DNSSEC back on from the same Cloudflare page after onboarding.
Every registrar hides this setting somewhere different. Search "<your registrar> change nameservers" if you get stuck.
2.4 Wait, then learn the domain's own menu
Nameserver changes take time to propagate. Sometimes minutes, sometimes longer. You don't need to do anything. Cloudflare checks on its own, and the domain status switches to Active when it's done.
Click into the domain and the sidebar switches to that domain's settings. AI Crawl Control, DNS, Email, SSL/TLS, and Security, which we'll use later, all live here.
Cloudflare now handles your DNS. Next up are the two settings that cause the most trouble: proxy status and HTTPS.
3. DNS, proxy, and HTTPS
3.1 Orange cloud vs. grey cloud
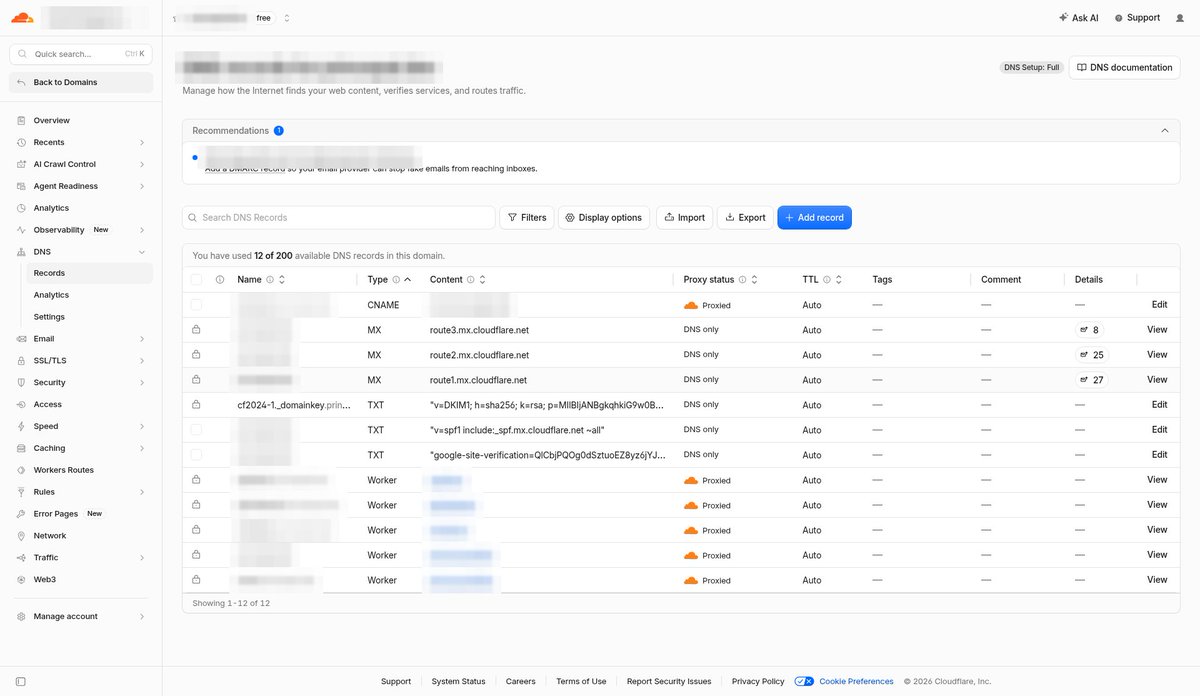
Open the domain's DNS → Records. Every record has a proxy status column.
Proxied (orange cloud): visitors hit Cloudflare first, then your server. CDN, HTTPS certs, protection, and caching all depend on this, and visitors don't see your server's real IP.
DNS only (grey cloud): Cloudflare only resolves the name, and visitors connect straight to your server.
Your root domain and www usually get the orange cloud. Switch to grey for:
-
The hostname you SSH with. The proxy only forwards common web ports, so SSH won't get through.
-
Mail server hostnames, like mail.example.com that your MX record points to. If its A record is proxied, mail won't reach the server. MX and TXT records have no proxy option at all, so they always show DNS only.
-
Anything else that needs a direct connection, like some game or database ports.
Habit worth having: serve the website on a proxied hostname, and put SSH and admin panels on a separate grey-cloud subdomain.
3.2 Wrong SSL/TLS mode = site won't load
Go to SSL/TLS → Overview to set the encryption mode. It controls how Cloudflare connects to your server. The visitor-to-Cloudflare leg uses HTTPS automatically once proxied.
-
Automatic SSL/TLS (recommended): Cloudflare scans your origin and applies the most secure mode it supports.
-
Full (strict): HTTPS to your server, and the certificate gets validated. Safest.
-
Full: HTTPS, but no certificate check. Self-signed certs are accepted.
-
Flexible: Cloudflare talks to your server over plain HTTP. No cert needed on the server, but that leg isn't encrypted.
-
Off (not secure): no encryption anywhere. Don't use it.
Not sure? Leave it on Automatic. If you want to set it yourself and your server has a valid cert (Let's Encrypt, or a Cloudflare Origin Certificate), choose Full (strict).
The classic Flexible failure is the browser saying "too many redirects." Your server redirects HTTP to HTTPS, Cloudflare keeps connecting over HTTP, and they bounce back and forth forever. Switching to Full or Full (strict) usually fixes it.
Sites hosted on Workers don't have an origin server of yours. Cloudflare handles the certs. This section mostly matters if you have your own server behind Cloudflare.
3.3 Turn on Always Use HTTPS
Under SSL/TLS → Edge Certificates, turn on Always Use HTTPS. Anyone typing http:// gets sent to https://.
The domain can now take traffic safely. Time to put something on it.
4. Deploy a site from a GitHub repo
4.1 Deploys go through Workers now
Static sites on Cloudflare used to mean Pages. The dashboard's create flow now defaults to Workers: import a GitHub repo, build it, deploy it as a Worker. There's still a line at the top that says "Looking to deploy Pages? Get started" (or similar), which tells you Pages is the legacy path.
For most people the difference is small. The official pricing page says requests to static assets are free and unlimited, and the import page says the same. If you later want an API route or storage binding, you add it to the same project.
Any repo with a single index.html works for the demo.
4.2 Pick the repo
Go to Compute → Workers & Pages, click Create, and choose Import a repository from GitHub. The first time, you'll authorize Cloudflare on GitHub. You can grant access to just the repos you want to deploy, not your whole account.
Search for your repo, select it, and click Next.
4.3 Build and deploy settings
-
Project name: defaults to the repo name, and shows up in the workers.dev URL.
-
Build command: optional. Plain HTML needs none. For Hugo, Astro, VitePress, etc., use their build command.
-
Deploy command: defaults to npx wrangler deploy. Leave it.
Click Deploy. If it fails, read the first error in the build log. It's almost always the build command or output directory.
4.4 Get the URL
When it's done, open the project overview. Under Domains & Routes you'll see project-name.your-subdomain.workers.dev, and the Visit button opens the site. A fresh project only has the workers.dev address. Custom domains come next.
Every push to main triggers a new deploy from then on.
4.5 Put it on your domain
Open the project's Settings → Domains & Routes and add a custom domain: www.example.com or example.com. Since the domain lives in the same Cloudflare account, the DNS record gets created for you.
First, make sure the hostname isn't already in use. Per the docs, you can't attach a hostname that already has a CNAME record. Delete that record first. If your root domain still points at an old site on a VPS, try a free subdomain like www or blog first and move over once it works.
Done. The site is live on your domain, with the cert already set up.
5. An email address on your domain that receives mail
5.1 Email Routing receives and forwards
Once you own example.com, you probably want hi@example.com for your site and bio.
Cloudflare Email Routing does this for free. Mail sent to hi@example.com lands at Cloudflare, and Cloudflare forwards it to your existing Gmail or Outlook.
Know where it stops: Email Routing receives and forwards. It isn't a full mailbox. Sending from that address is a separate feature (Email Sending, still in Beta at time of writing) and isn't covered here.
Your domain's DNS has to be on Cloudflare. You did that in chapter 2.
5.2 Onboard the domain
Go to Compute → Email Service → Email Routing. The list shows domains already set up. For a new one, click Onboard domain at the top right.
Cloudflare will ask to add some DNS records (MX, SPF, DKIM). Confirm them. They usually go live within minutes.
If the domain already uses another provider's business email, its MX records will conflict with Email Routing. Decide who receives the mail before you turn it on. If the DNS records column says misconfigured, that's usually why.
5.3 Add a destination address, then a routing rule
Click into the domain. You'll see tabs like Overview, Activity Log, Routing Rules, and Destination Addresses. If the summary on the right shows routing as Enabled, receiving works.
First, add your normal inbox under Destination Addresses. Cloudflare emails it a verification link. Click it. The address can't be used until it shows Verified.
Then go to Routing Rules and create a rule:
-
Custom address: hi before the @, your domain after
-
Action: Send to an email, pick the verified address
-
Save
Send a test from another account to hi@example.com. It should arrive within seconds to a few minutes. If not, check spam, then check that your MX records only point to Cloudflare's servers.
You can make as many rules as you like: github@, shop@, newsletter@ for different uses. When one starts getting spam, delete that rule. There's also a Catch-all rule. Turn it on and every unmatched address follows it.
6. R2 for images and backups
6.1 The big win: no egress fees
R2 is Cloudflare's object storage. Think of it as a big bucket for files: images, video, backup archives, static assets.
People like it because egress is free. A lot of cloud storage bills you for downloads, so a popular image can run up the bill fast. The R2 free tier includes 10 GB storage per month, 1 million Class A operations, and 10 million Class B operations. Downloads themselves cost nothing.
Class A is roughly writes and lists. Class B is roughly reads. A personal image host or backup bucket rarely uses it all.
One catch: the free tier only covers Standard storage, not Infrequent Access.
6.2 Create a bucket
Go to Storage & databases → R2 Object Storage and click Create bucket.
-
Bucket name: the page warns that bucket names are permanent. Pick it with the use in mind.
-
Location: leave it on Automatic.
-
Default storage class: keep Standard. Infrequent Access drops you out of the free tier.
Create it, then drag an image in. It shows up under Objects.
6.3 Serve it from your own domain
Buckets are private by default. To use files on your site, enable public access in the bucket's Settings. Two ways:
Custom domain. Under Custom Domains, click Add, enter img.example.com, confirm the DNS record, and connect. It usually goes Active in a few minutes.
Public Development URL. The r2.dev address. Click Enable and type allow to confirm.
For anything real, use a custom domain. The docs are clear that r2.dev is rate-limited, meant for dev/testing only, and doesn't get caching or access controls.
Now https://img.example.com/filename serves your file directly. Drop it into your site, Markdown, or your blog's image settings.
The S3 API URL at the top of the settings page includes your account ID. Blur it before you share a screenshot.
This is how I'd treat any storage behind a Worker app: files in R2, the Worker in front, no egress bill to think about.
7. Block traffic you don't want
7.1 See who's crawling you
Besides search engines, a lot of AI company crawlers now scrape the web. Some train models, some fetch pages live for user searches. For a content site, that traffic may not bring visitors, but it still uses resources.
Cloudflare puts this under AI Crawl Control in the domain menu, and it works on the free plan. The overview lists crawlers by operator (OpenAI, Anthropic, Common Crawl, ByteDance, Google, and so on) with how many requests each was allowed.
For scale, the original author's small demo domain got 974 AI crawler requests in 7 days: 390 allowed, 584 unsuccessful. OpenAI's ChatGPT-User alone made 113. "Unsuccessful" doesn't mean blocked: 349 of them were requests for pages that didn't exist, which returned 404. And that's a low-traffic site. Content-heavy sites get far more.
7.2 Allow or block per crawler
AI Crawl Control has sub-pages: Overview, Metrics, Security, Optimization, Signals. Allow/block lives under the security settings, and you can set it per crawler.
-
Allow: the crawler sends citations or traffic, or you're fine being indexed.
-
Block: you don't want it taking your content. You can return 403 Forbidden or 402 Payment Required.
Rule of thumb: allow search engine crawlers, or you'll vanish from search. For training-only crawlers, decide based on how you feel about your content being used.
7.3 AI Labyrinth slows bots down. It doesn't block them
Some crawlers ignore robots.txt and keep changing identity. AI Labyrinth builds them a maze: it adds nofollow links only bots can see, pointing to AI-generated pages, to waste the time of bots that don't follow crawling rules. The dashboard says these links don't change your page content and are only visible to bots.
Turn it on under the domain's Security → Settings. Find AI Labyrinth and flip the toggle. It's still marked Beta.
Know the difference: per the docs, AI Labyrinth isn't a block. Requests aren't blocked or challenged. To actually keep a crawler out, use the block from 7.2. On the same page, the AI bot policy settings let you control AI bot access by type.
For more rules (blocking by country, path, or rate), look at the free-plan WAF custom rules.
8. Workers: a bit of backend for your site
8.1 What a Worker is
The site from chapter 4 is static. Everyone sees the same pages. For a backend that handles form submissions, calls APIs, or returns dynamic data, you'd usually rent a server.
Workers let you run JavaScript on Cloudflare's network instead. A request comes in, your code runs, a response goes out. No servers to manage, no scaling to think about.
The free plan handles 100,000 requests per day, with up to 10 ms of CPU time per request. CPU time only counts time your code is actually computing. Time spent waiting on network calls doesn't count, so code that calls external APIs rarely hits the limit.
This is the same runtime Shiba runs on. Plain Workers handle the request path, and Durable Objects come in when you need state that sticks around.
8.2 Deploy your first Worker
To keep the backend separate from the chapter 4 site, make a new Worker. Go to Compute → Workers & Pages, click Create, choose Start with Hello World, name it hello-ai, and deploy.
You'll get hello-ai.your-subdomain.workers.dev. Open it and you'll see Hello World!.
That line means your code is running on Cloudflare's network. Next chapter, you'll hook up a model.
8.3 When you need data: KV and D1
A Worker doesn't keep data between requests. Each request is on its own. For storage, Cloudflare has two free options under Storage & databases:
| Storage | Good for | Free tier |
|---|---|---|
| Workers KV | Key-value data: config, cache, short links | 100k reads/day, 1,000 writes/day, 1 GB total |
| D1 (SQLite) | Data you query: comments, order records | 5M rows read/day, 100k rows written/day, 5 GB total |
This guide doesn't need either. Just know they exist and add them when a project calls for it.
9. Workers AI: open models on the free tier
9.1 Call models without a GPU
Workers AI hosts a set of open models on Cloudflare's GPUs. A Worker can call them directly. No GPU of your own, no separate model API key.
The free plan gives you 10,000 Neurons per day. Neurons are Cloudflare's own unit, and usage varies by model and request length. Past that, you need the paid plan, billed at $0.011 per 1,000 Neurons.
The dashboard's AI menu lists the supported models: chat, translation, image generation, speech recognition, and more.
9.2 Bind Workers AI to your Worker
Back on hello-ai's overview, find Bindings, click Add binding, pick Workers AI, and set the variable name to AI. The binding is what lets your code call env.AI. The name must match your code exactly, case included.
9.3 Change the code so it answers questions
Click Edit code at the top right and replace the default with:
export default {
async fetch(request, env) {
const answer = await env.AI.run("@cf/google/gemma-4-26b-a4b-it", {
messages: [
{ role: "system", content: "You are a concise assistant." },
{ role: "user", content: "Explain what a CDN is in two sentences." },
],
chat_template_kwargs: { enable_thinking: false },
});
return Response.json(answer);
},
};
This calls Google's open Gemma 4 model. The model ID comes from Cloudflare's official getting-started docs. messages uses the usual chat format: system sets the role, user is the question.
Deploy, then refresh the workers.dev page.
You'll get JSON back, and content holds the model's answer. That's a working AI endpoint with no server, no GPU, and no extra API key.
Check the usage field at the end too. In the original demo, one short Q&A used 84 tokens and about 1.67 Neurons. At 10,000 free Neurons a day, that's roughly five to six thousand short Q&As per day.
Model lists and recommended IDs change. If a call errors, first check the AI models page to see if the ID still exists.
One more thing: anyone can open that workers.dev URL, and every visit uses quota. On the free plan, going over the daily limit just makes calls fail. You won't get charged. Still, after the demo, turn off workers.dev access in settings or delete the Worker. If you're turning it into a public service, add access control first.
9.4 Clef: a model for agent decisions
On October 1, Cloudflare released two open decision models, Clef and Clef-flash. They're not chat models. They don't write long answers. They answer multiple-choice questions.
You give it some content plus a set of questions and possible answers ("Is this ticket urgent?" "Which team should get it?"). Instead of generating text, it scores each option with a probability. Your code reads the probabilities and decides what happens next.
Clef
Base: Qwen 3.8 27B
Notes: 64K context, image input, ~209 ms median latency
Clef-flash
Base: Qwen 3.5 9B
Notes: ~39 ms median latency, built for speed
Both are Apache 2.0, with weights on Hugging Face, and you can call them on Workers AI as @cf/cloudflare/clef and @cf/cloudflare/clef-flash.
They fit the quick routing steps inside an agent: should this email be handled, is this comment spam, which tool gets this task. Those calls used to go to a big LLM. Now a faster, specialized model can handle them.
10. Let agents drive: managing Cloudflare with cf
10.1 Half of CLI usage is already agents
Cloudflare's original CLI is Wrangler, mainly for building and deploying Workers. Cloudflare shared some numbers: in March 2026, agents made up a quarter of Wrangler usage. By the week before cf launched, it was 48%, nearly half.
So on September 28, Cloudflare released a new CLI, cf, now in public beta. Two main differences from Wrangler:
Much wider coverage. Wrangler has about 280 command paths. cf covers 3,000+ Cloudflare API operations: DNS, R2, email, security settings, all of it.
Built for agents. JSON output by default, natural-language command search, and extra guardrails on dangerous operations.
Wrangler isn't going away yet. The plan is to ship a final Wrangler release that nudges you to migrate after the beta ends, then maintain it for 18 months. Existing projects can migrate slowly. The default deploy command from chapter 4 is still npx wrangler deploy.
10.2 Install and log in
cf installs via npm, so you need Node.js.
npm install --global cf
cf auth login
cf auth login opens your browser. Approve on the Cloudflare page, go back to the terminal, and you're in.
10.3 Don't know the command? Let it search
The best part for agents: nobody needs to memorize commands. Describe
what you want in plain English and it returns up to 5 matching commands.
cf cli search "create D1 database"
You get JSON with each command and its description. The best match, cf d1 create, comes first. Then check what arguments it takes:
cf schema d1 create
10.4 Preview first, then run
For create and update commands, add --dry-run. It prints the request it would send without sending it.
cf d1 create --name my-database --dry-run
The output shows the method, endpoint, and body. Check it, then drop --dry-run to run it for real. The endpoint includes your account ID, so blur it before sharing screenshots.
Deletes get one more layer. In non-interactive mode (when an agent runs things on its own), a delete without --force prints Aborted. and stops. An agent has to add an extra flag on purpose to delete anything, which is easy to spot when you review its commands.
Careful: that aborted command still exits with code 0. It looks like it worked, but nothing got deleted. The docs say a successful exit doesn't mean the resource is gone. Have your agent check again after any delete.
10.5 Tell your agent to use it
Add Cloudflare's recommended line to your user-level AGENTS.md or CLAUDE.md so it applies to every project:
When interacting with Cloudflare, use the cf CLI unless the project has a Wrangler configuration file.
Claude Code, Codex, Pi, and similar agents will know which tool to reach for.
Then just ask: "list the R2 buckets in my account," or "add a CNAME for example.com, dry-run it first and show me."
10.6 Give tokens only what they need
When an agent runs unattended (cron jobs, CI), it can't open a browser to log in. You'll create an API token and put it in the CLOUDFLARE_API_TOKEN environment variable.
Three rules:
-
Grant only the permissions and zones the task needs. Don't tick "all" to save time.
-
Set a sensible expiry, and delete tokens you no longer use.
-
Never put tokens in code, commit them to a repo, or paste them into an AI chat. If one leaks, revoke it in the dashboard and make a new one right away.
An agent can click buttons for you, but whatever permissions it holds are exactly how much damage a mistake can do.
11. Free-tier cheat sheet and FAQ
11.1 Free tiers in one table
Workers
Free tier: 100,000 requests/day, 10 ms CPU each; static asset requests free and unlimited
When you need more: Paid plan from $5/month, includes usage
Pages (legacy)
Free tier: 500 builds/month, 1 concurrent build, 20,000 files per site, 25 MiB per file
When you need more: See official paid plans
Workers KV
Free tier: 100k reads/day, 1,000 writes/day, 1 GB storage
When you need more: Included in Workers paid plan
D1
Free tier: 5M rows read/day, 100k rows written/day, 5 GB storage
When you need more: See official paid plans
R2
Free tier: 10 GB storage/month, 1M Class A ops, 10M Class B ops, free egress; Standard storage only
When you need more: Usage-based beyond that
Workers AI
Free tier: 10,000 Neurons/day
When you need more: Paid: $0.011 per 1,000 Neurons
Email Routing
Free tier: Receive and forward
Numbers come from Cloudflare's official docs as of October 2026 and may change.
11.2 The six most common breakages
Browser says "too many redirects"
Check first: Is SSL/TLS on Flexible while the server forces HTTPS?
First fix: Switch to Automatic, Full, or Full (strict)
Domain never activates
Check first: Are the registrar nameservers right? Is DNSSEC off?
First fix: Recheck both NS values and wait for propagation
Mail stops arriving after onboarding
Check first: Did the scan miss MX, SPF, or DKIM?
First fix: Add the mail records, or check Email Routing's DNS records status
Can't SSH into the server
Check first: Is the SSH hostname proxied (orange cloud)?
First fix: Use a DNS-only subdomain, or the IP directly
R2 images slow or rate-limited
Check first: Are you using the r2.dev URL?
First fix: Switch to a custom domain
Worker hits CPU limit errors
Check first: Heavy computation or loops in the code?
First fix: Move the computation elsewhere, or upgrade
11.3 A default path for new projects
For any new project, go in this order:
-
Put the domain on Cloudflare, set up DNS and HTTPS.
-
Import the site from GitHub so pushes auto-deploy.
-
Need email? Turn on Email Routing.
-
Need file storage? R2 with a custom domain.
-
Need an API? Write a Worker. Need data? Add KV or D1.
-
Need a model? Bind Workers AI. Need quick decisions? Try Clef.
-
Hand day-to-day ops to an agent: cf to find the command, dry-run, then run.
Most projects don't need all seven. Most personal sites are fine stopping at step 3. Add more when you actually need it.
11.4 References
-
Add a site to Cloudflare (https://developers.cloudflare.com/fundamentals/setup/manage-domains/add-site/)
-
Pages limits (https://developers.cloudflare.com/pages/platform/limits/)
-
Enable Email Routing (https://developers.cloudflare.com/email-routing/get-started/enable-email-routing/)
-
R2 pricing (https://developers.cloudflare.com/r2/pricing/) · R2 public buckets (https://developers.cloudflare.com/r2/buckets/public-buckets/)
-
AI Crawl Control (https://developers.cloudflare.com/ai-crawl-control/) · AI Labyrinth (https://developers.cloudflare.com/bots/additional-configurations/ai-labyrinth/)
-
Workers pricing & limits (https://developers.cloudflare.com/workers/platform/pricing/)
-
Workers AI pricing (https://developers.cloudflare.com/workers-ai/platform/pricing/) · Workers AI getting started (https://developers.cloudflare.com/workers-ai/get-started/)
-
Introducing Clef · Introducing cf · Use cf with coding agents
Open tools referenced:
built on the free tier. tag the people shipping this stack:
@CloudflareDev @Cloudflare @KentonVarda @WalshyDev @threepointone